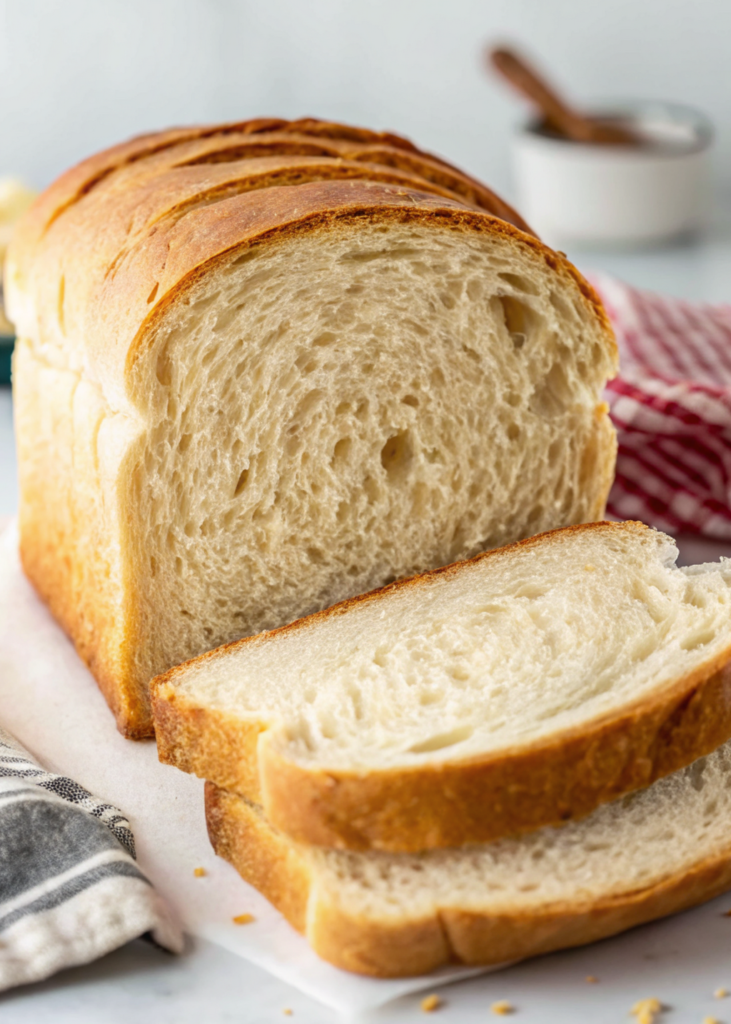
Simply Sandwich Bread is a soft, fluffy everyday bread that’s made to be easy, dependable, and perfect for all kinds of sandwiches. It slices cleanly, toasts evenly without burning too fast, and tastes great with everything from peanut butter to a melty grilled cheese. Unlike store-bought bread that often includes preservatives and hard to pronounce ingredients, this homemade loaf is made with simple pantry staples you likely already have. That makes it an ideal recipe for beginners and a comforting, go-to bread for experienced bakers as well.
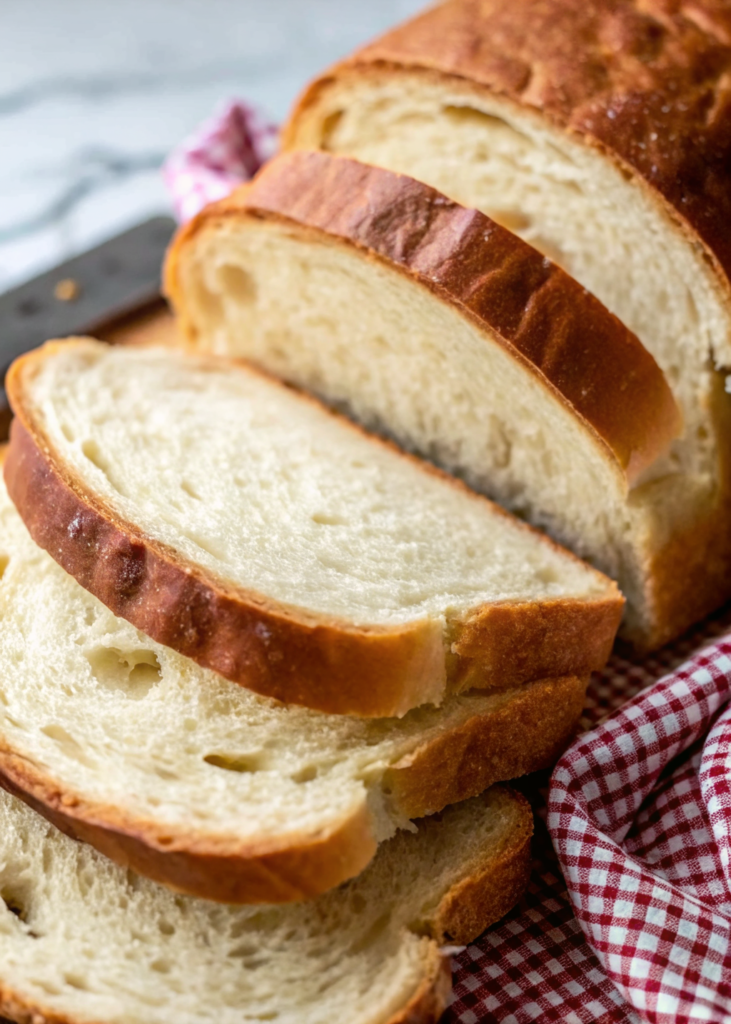
This bread is mild in flavor, slightly chewy, and tender on the inside with a soft crust on the outside. It’s designed to hold fillings well without falling apart, which is why it’s called sandwich bread. Kids love it because it’s soft and easy to bite into, and adults love it because it tastes fresh and homemade. Best of all, making Simply Sandwich Bread helps you understand how bread works, turning simple ingredients into something warm and wonderful.
Why You Should Try Simply Sandwich Bread
You should try Simply Sandwich Bread because it’s one of the easiest and most useful breads you can make at home. This recipe doesn’t require fancy tools or special skills, and the steps are clear and forgiving. Even if this is your first time baking bread, you’ll feel proud watching the dough rise and turn into a golden loaf. The smell alone while it bakes is enough to make the whole kitchen feel cozy.
Another great reason to try this bread is how versatile it is. You can use it for school lunches, breakfast toast, or quick dinners. It freezes well, saves money compared to buying bread every week, and lets you control exactly what goes into your food. Once you make it a few times, you may never want to go back to store-bought sandwich bread again.
Table of Contents
Table of Contents
Ingredients you’ll need for Simply Sandwich Bread
Here is everything you need to make Simply Sandwich Bread:
- All purpose flour or bread flour
- Warm water
- Active dry yeast or instant yeast
- Sugar
- Salt
- Vegetable oil or melted butter
How to Make Simply Sandwich Bread
Step 1
To begin, warm the water until it feels like warm bath water, not hot, because water that is too hot can kill the yeast. Pour the warm water into a large mixing bowl and stir in the sugar until it dissolves. Sprinkle the yeast over the top and let it sit for several minutes until it becomes foamy. This step is important because it tells you the yeast is alive and ready to work, which helps the bread rise properly.
Step 2
Once the yeast mixture looks bubbly, add the oil or melted butter and stir gently. Slowly add the flour and salt, mixing as you go, until a soft dough forms. The dough should pull away from the sides of the bowl but still feel slightly sticky. Turn the dough out onto a lightly floured surface and knead it by hand, pushing it away from you with the heel of your hand, folding it back over itself, and turning it slightly each time. Keep kneading until the dough becomes smooth and elastic, which usually takes several minutes and helps develop the structure of the bread.

Step 3
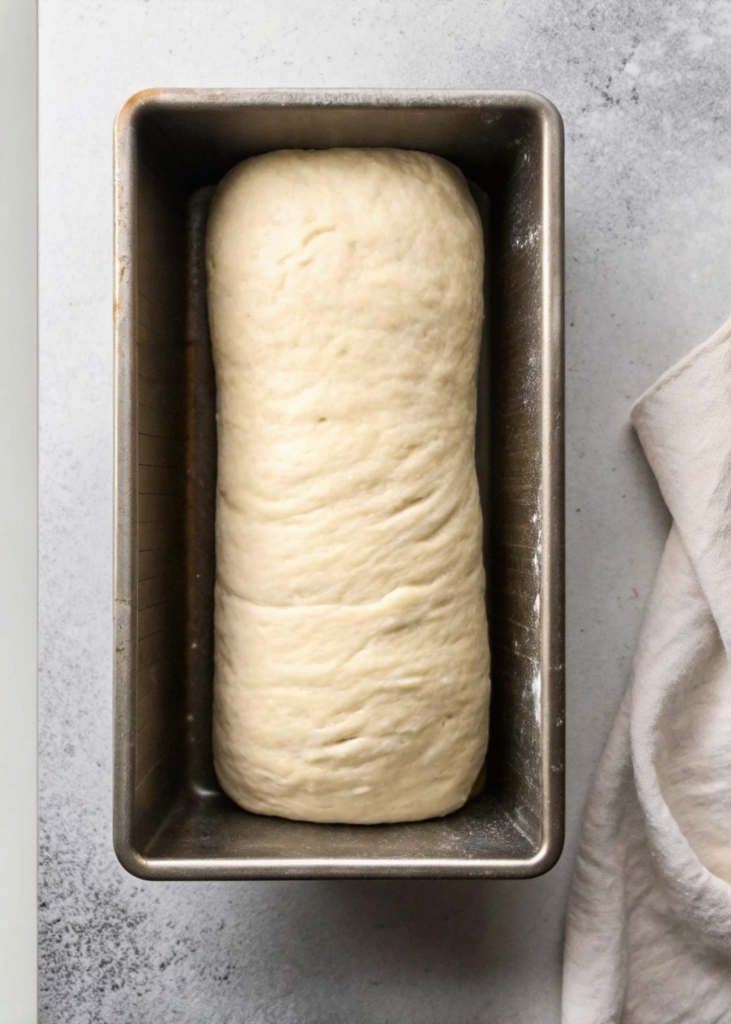
Place the kneaded dough into a lightly greased bowl, turning it once so all sides are coated. Cover the bowl with a clean kitchen towel and set it in a warm place to rise. Let the dough rise until it doubles in size, which may take about an hour depending on the temperature of your kitchen. When the dough is ready, gently punch it down to release excess air, then shape it into a loaf by rolling it tightly and tucking in the ends.
Step 4
Place the shaped dough into a greased loaf pan, cover it again, and let it rise a second time until it rises just above the edge of the pan. Preheat your oven while the dough finishes rising. Bake the bread until the top is golden brown and the loaf sounds hollow when tapped. Remove it from the pan and let it cool completely on a wire rack before slicing, because cutting too early can make the bread gummy inside.
You can add this post to your favorite Pinterest board!
Kitchen equipment you will need :
Before you start, make sure you have these kitchen tools ready:
- Large mixing bowl
- Measuring cups and spoons
- Wooden spoon or spatula
- Clean kitchen towel
- Loaf pan
- Oven
- Wire cooling rack
Tips and Variation Ideas
For extra softness, you can brush the top of the loaf with melted butter right after baking. If you want evenly shaped slices, let the bread cool completely before cutting. Using a serrated bread knife also helps prevent squishing the loaf while slicing.
What can I serve with this Simply Sandwich Bread?
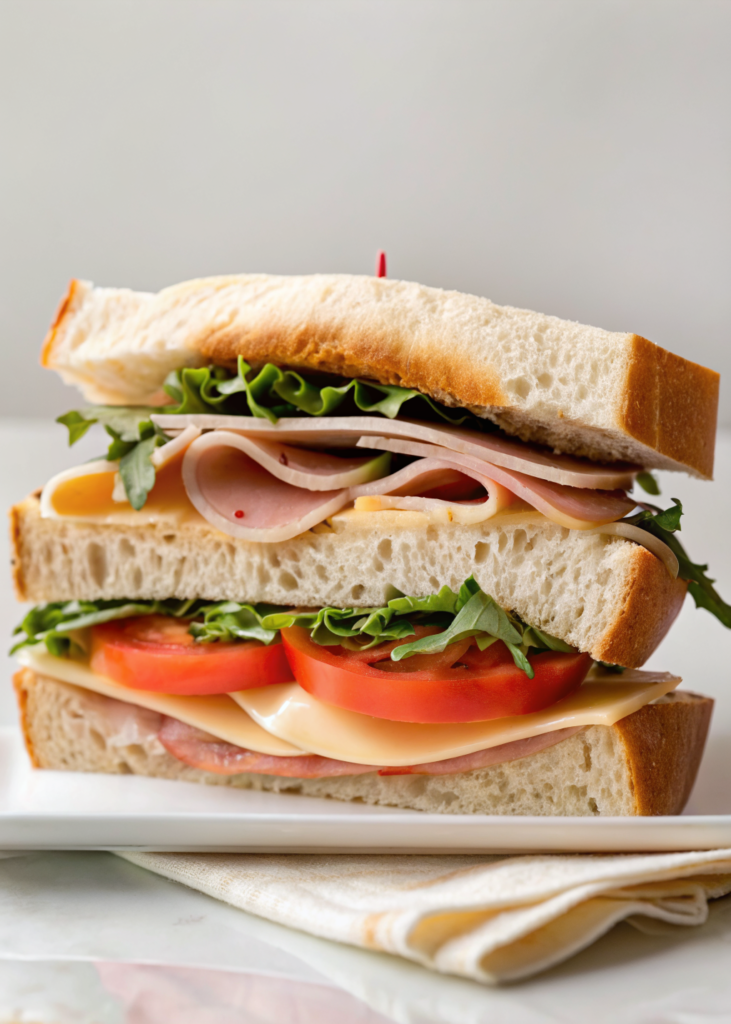
I often serve this Simply Sandwich Bread with lunch and like to use it as a sandwich, filling it with chicken, salmon, or anything else. For breakfast, I like to spread it with cheese, jam, or honey. As for drinks, I like it with coffee, fruit juice, or orange juice.
Commonly Asked Questions
How long should I knead the dough ?
Knead until the dough is smooth and stretchy, usually several minutes by hand.
Can I freeze Simply Sandwich Bread ?
Yes, slicing and freezing the bread keeps it fresh and easy to use later.
Can I toast Simply Sandwich Bread ?
Absolutely, it toasts evenly and tastes great with butter or jam.
What size loaf pan should I use ?
A standard loaf pan works best for even baking.

Simply Sandwich Bread
Course: Bread, Breakfast, LunchCuisine: AmericanDifficulty: Easy12
servings15
minutes30
minutes130
kcal1
hour45
minutesSimply Sandwich Bread is a soft, fluffy homemade loaf made with simple pantry ingredients. It’s easy to prepare, perfect for sandwiches or toast, and great for beginners who want fresh, comforting bread at home.
Ingredients
All purpose flour or bread flour
Warm water
Active dry yeast or instant yeast
Sugar
Salt
Vegetable oil or melted butter
Directions
- To begin, warm the water until it feels like warm bath water, not hot, because water that is too hot can kill the yeast. Pour the warm water into a large mixing bowl and stir in the sugar until it dissolves. Sprinkle the yeast over the top and let it sit for several minutes until it becomes foamy. This step is important because it tells you the yeast is alive and ready to work, which helps the bread rise properly.
- Once the yeast mixture looks bubbly, add the oil or melted butter and stir gently. Slowly add the flour and salt, mixing as you go, until a soft dough forms. The dough should pull away from the sides of the bowl but still feel slightly sticky. Turn the dough out onto a lightly floured surface and knead it by hand, pushing it away from you with the heel of your hand, folding it back over itself, and turning it slightly each time. Keep kneading until the dough becomes smooth and elastic, which usually takes several minutes and helps develop the structure of the bread.
- Place the kneaded dough into a lightly greased bowl, turning it once so all sides are coated. Cover the bowl with a clean kitchen towel and set it in a warm place to rise. Let the dough rise until it doubles in size, which may take about an hour depending on the temperature of your kitchen. When the dough is ready, gently punch it down to release excess air, then shape it into a loaf by rolling it tightly and tucking in the ends.
- Place the shaped dough into a greased loaf pan, cover it again, and let it rise a second time until it rises just above the edge of the pan. Preheat your oven while the dough finishes rising. Bake the bread until the top is golden brown and the loaf sounds hollow when tapped. Remove it from the pan and let it cool completely on a wire rack before slicing, because cutting too early can make the bread gummy inside.
Notes
- Use warm water, not hot, to avoid killing the yeast.
- Let the dough rise in a warm, draft-free area for best results.
- Lightly grease your bowl and pan to prevent sticking.
- Knead the dough until it feels smooth and stretchy, not rough or sticky.